Ultimate Guide To Metal Stamping At Home! Equipment And Materials Needed
If you’re considering getting started metal stamping at home, there are some essentials bits of information you’ll need. No matter if you want to personalize your jewelry or metalwork before you sell it or refine your technique, this in-depth guide will help.
Tools You’ll Need to Get Started
Like any hobby you pick up, you’ll have to buy several essential tools before you can set up your area at home and start metal stamping. It can cost you a decent amount upfront, but it pays for itself with all the use you get out of each part. You can find these tools online, in craft stores, or you can purchase starter kits that have almost all of the following tools.
- Metal stamps (letters, numbers, icons, shapes)
- Metal tags or blanks
- Polishing cloth
- Stamping block
- Stamping hammer
- Stamping tape
Why You Need All of These Tools
Looking at this list, it can seem overwhelming and expensive to go out and buy all of the tools you need. If you know someone that is really into metal stamping already, you can ask if they’d let you borrow their tools so you can try it out and see if you like it.
Metal Stamps

- Professional quality, Chrome Vanadium Steel
- Perfect for personalizing jewelry and other items
- Compact size box, won't take up a lot of space
- Set includes 1 Whimsy Heart and 27 letters (from A - Z) plus the "&" symbol as well as 9 number punches (0 - 8) - use the 6 as a 9
- Metal alphabet punches are on a 1/8" (3mm) square shank for use as impact hammer bits
The different stamps is where metal stamping can turn into an expensive hobby, especially if you’re after specific shapes, icons, numbers, or letters. Your typically buy these metal stamps in sets that include:
You can find your punctuation marks, numbers, and letters in dozens of different sizes and fonts, and this means you can pick individualized fonts for your projects. Newsprint is one of the most popular fonts, and you can make it look rustic without losing its clarity. Shapes are also very popular to have like stars, hearts, and flowers.
It’s also a good idea to have a stamp that creates full stops or dots because they work wonderfully for initials or dates. Once you get more into this hobby, you can buy special hammers that have different types of textures that create different effects.
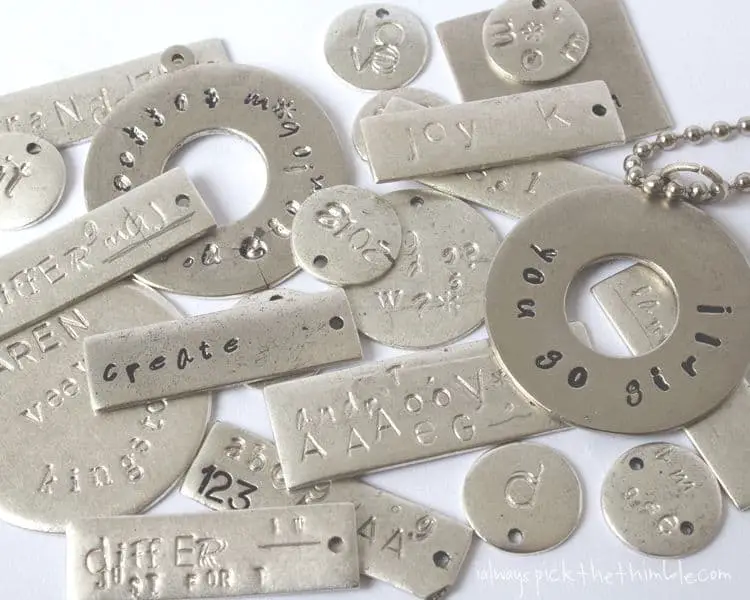
Metal Tags or Blanks
You’ll need to have metal blanks or tags to stamp your shapes into, and you can get them in copper, brass, or sterling silver. To start, it’s a good idea to start with flat-shaped tags because they’re very user-friendly when you compare them to three-dimensional bangles or shapes. You can plate metal blanks once you finish stamping. Doing it before can cause damage.

- Stamping blank tags: the diameter of this stamp tag is 1 inch/ 25 mm, the hole diameter is 0.075 inch/ 1.9 mm, thickness is 0.06 inch/ 1.5 mm, convenient to adopt the tap method, blank design is great for stamping to leave imprint
- Protective film: the aluminum stamping blank has a protective cover in the front and back surface, easy to be peeled off, and will leave a very nice, clean and scratch-free surface for stamping into
- Sturdy quality: the metal stamping blanks are made of aluminum, with a good polish have a luster similar to sterling silver, lightweight and easy to use, take a stamp clearly and easily, will not be easily bent
- You will receive: aluminum stamping blank tags are in 50, 100, 150 pieces for you to choose, which will meet your various needs; Note: metal products, pointed edges, please use with caution
- Wide applications: round metal key tags are great for making sign, pendant, jewelry diy, charms, dangles, or you could also use them as necklaces, pendants, bracelets and more
When you start to practice metal stamping, use more cost-effective materials like aluminum or copper because you’ll make mistakes, and you don’t want to waste the more expensive gold or silver blanks. You can buy larger aluminum or copper plates to test on and get your technique down. We’ve outlined the biggest alloys below.
- 14 karat gold filled
- Aluminum
- Brass
- Copper
- Fine silver
- Pewter
- Sterling silver
Try to get three-millimeter stamps to start and look for stamps that are higher on the Rockwell Scale. The Rockwell Scale measures the metal’s indentation hardness, and this will tell you how deep your impressions will go in your stamp. It’s important that you know the different metal hardnesses when you stamp them because harder metals like stainless steel can wear down your stamps while aluminum won’t.
Polishing Cloth
A polishing cloth will help you clean all of your blanks up after you finish stamping them. You can find polishing cloth at your local crafting store or online. Using these pieces of cloth on your tags, blanks, or charms will give you a professional-grade look, and it makes your jewelry look like something people would be happy to buy.
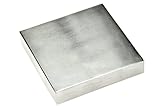
Stamping Block
A metal stamping block will act like a barrier that protects your desk or your work surface. They’re heavier, and they come with padded, soft areas on the bottom of each corner with a rubber base to stop the block from moving and protect your work surface. You can add a piece of hardboard underneath the block to help absorb the hit.
- Premium Quality Steel Construction: Crafted from durable steel, this 4” x ¾” x 4” bench block is designed to withstand heavy use in various crafting and jewelry-making applications
- Versatile Tool for Crafting: Ideal for a range of activities including hammering, letter imprinting, riveting, texturing, and shaping, making it a must-have for jewelers and hobbyists
- Heavy and Stable: Weighing 3 lbs and 2 oz, its substantial weight ensures the block remains steady and in place on your workbench during use
- Protects Work Surfaces: Helps safeguard your workbench from wear and tear while providing a solid surface for working on metal and other hard materials
- Ready to Use: Comes lubricated in oil for immediate use and to help maintain its condition, ensuring longevity and reliability for all your crafting needs
Softer metals like aluminum or gold tend to curl up when you stamp them, and you can prevent this from happening by using a nylon block and hammer. The softer hammer will flatten your blank back into shape, and it shouldn’t impact your stamped design.
Stamping blocks come in a huge range of sizes, but a small two by two block is excellent for beginners. If it doesn’t have a pad underneath it, it’s a good idea to buy a rubber mat or a leather bench pad to help hold it in place. Make sure your stamping block is totally flat before you work because this will give you even impressions.
Stamping Hammer
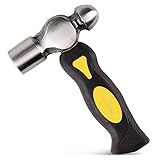
- Jewelry Hammer: These 1-pound metal stamps for jewelry making are designed with a grooved grip that helps provide the right amount of force for making jewelry, metal stamping, or working with leather
- Dual-Sided: The double-sided craft leather hammer will evenly disperse energy while providing maximum force and precision while completing a woodworking or construction project
- Reliable Quality: This jewelry stamp hammer weighs 1 pound with an ergonomic grip for additional comfort
- Dimensions: The mini metal jewelry stamping hammer measures 6.3 x 4 x 1.25 inches; perfectly sized to fit inside a drawer, toolbox, or on a tool belt
- Comes With: You will receive 1 black and yellow chasing metal stamp hammer for jewelry making, crafts, home improvement projects, and breaking geodes
This type of hammer is slightly smaller than your average household hammer, and it helps you get highly precise strikes. However, it has to be heavy to help you get the best results from your various stamps. If you forego this hammer for a traditional household one, you increase the risk of missing the stamp and having a less precise strike.
You can buy a steel stamping hammer, but steel transfers energy back to the hammer when you strike your metal plates or tags. This can make your hammer bounce back after each hit, and you’ll end up with ghost or skipped impressions. Because brass is a softer metal than steel, it will absorb the hit’s impact and help you make a deeper impression. The ImpressArt 1 Pound Metal Stamping Hammer is a good choice.
Stamping Tape
Stamping tape helps anchor your blank in place when you stamp it to ensure you get an even placement. If you stamp smaller items that are too little to hold in place with your hand, stamping tape is a must for safety’s sake. This tape also ensures you get a better finish because you’ll get maximum impact with no sliding.

You could use masking tape to help you hold down and position your stamps. You can use a pencil to make marks on your tape to help you get even spaces between all of your characters too. Stamping tape will also help you get your words in a neat line.
Beginning Metal Stamping
It’s a good idea to start out small before you jump into large projects. When you buy your metal tags or blanks, you want to ensure your buy some bigger tags or practice blanks that you can use to perfect your technique. Using a flat surface is best for any beginner because they’re easy to stamp with your desired design.
Setting Up Your Workstation
Now that you have all of your tools and materials you need for metal stamping, it’s time to set up your workstation. You can move it from space to space, but you’ll have a lot of pieces. It’s easier to keep everything in one place.
- Wherever you set up your workspace, make sure that it has a sturdy surface that can withstand hammering. You could slide a thick piece of wood over a desk or table to protect the surface, or you could set up an independent station.
- Organize all of your tools and equipment so that it’s in reach before you start stamping
- Put your stamping block in front of you so that it’s close enough for you to be able to stamp your blanks.
- Add stamping tape to hold your blank on the block. If you want to add tape guides, now is the time to do so.
- Pick out your stamp and line it up. Hold it between your thumb and forefinger.
- Get your hammer and hit the top of your stamp. Getting a direct hit will take practice. You’ll learn how much pressure to apply and whether or not you want to hit each stamp twice.
Refining Your Metal Stamping Technique
Once you start stamping, there are several ways you can refine your metal stamping technique. You should concentrate on one area at a time for the best results. When you get comfortable with it, move on to the next.
Impact or Pressure
It can be challenging to decide how much pressure or impact you need to get the indent depth you want in the metal. If you lift the stamp after you hit it to find your mark too light, it’s almost impossible to line it back up again to go in for another hit. This will improve over time.
Almost all metals will need a decently hard hit from your hammer to cause a stamp to appear in your metal. However, you have to pay attention to the type of metal you use. For example, brass will require a much harder hit than aluminum.
Stamp Placement
Before you start your project, you want to decide on the design aspects of your project to ensure your design or word will fit onto your blank. Using a pencil or pen with stamping tape will help you decide on your letter or shape placement before you start stamping. To make it as neat as possible, start in the center and plan outward toward the edge of your blank.
Also, make sure your stamp is the right way up before you start anything. It’s an easy mistake to make, and it can result in a letter or design to be at a 90-degree angle. This can throw off your entire design and final look.
Metal Stamp Projects for Beginners and Advanced Projects
Once you feel like you’ve got enough practice in to create your designs, you can start thinking about the different projects you want to create. There are hundreds of potential projects available, and we’ve outlined a few below.
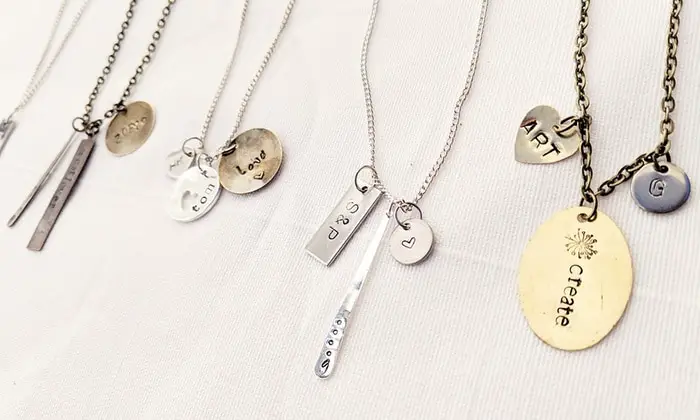
- Jewelry Charms – You get limited characters, so it’s a great way to practice your technique and spacing.
- Name Pendants – Add a nicely personalized touch to a simple chain or pretty beaded necklace.
- Pet Tags – Stamp the pet’s name and owner’s address or phone number.
- Special Date – This is an excellent gift for birthdays, engagements, or weddings.
As you get better and better at your metal stamping, your pieces will look more polished and professional. Even if everything isn’t perfect, slightly off-centered looks create a rustic and whimsical look. Once you get more experienced, you can take on more challenging projects like the ones we outlined below.
- Bag charms
- Book quote bookmarks
- Bracelet charms
- Constellation pendants or charms
- Earrings
- Greeting card charms
- Keyrings
- Necklace charms
- Pendants
- Personalized accessories and jewelry
- Plant markers
- Silver bangles
- Stamped silverware
Tips for Boosting Your Metal Stamp Look
If you look at Etsy, you’ll quickly notice that there are dozens of different metal stamp vendors. The stamps can all look different tool, and this is due to different techniques. There are extra tools available too that can help enhance how your finished product looks.
Dark Indents
Etsy sellers tend to have very dark stamps with deep indents, and there is a very easy way to achieve this. Once you stamp your blank or metal tag, get a very fine sharpie and carefully fill in the indent. If you go outside the lines, get your polishing cloth and rub the stray lines away.
You can achieve the same effect by stamping on a blank enamel. Not only is this more long-lasting than the sharpie method, but the enamel will give you a professional finish. This finish mimics what you get with jewelry, and this will help it withstand wear and tear.
Holes
Some blanks come with holes, while some do not. If they don’t and you want to attach them to a chain or piece of jewelry, you can punch a small hole in the metal. You can make this hole using punch pliers or using the same technique you use to stamp.
Adding Textures
We mentioned that you could get different stamping hammers to add textures to your metal blanks and tags like zig-zags, dimples, or lines. However, this can be expensive. This is why it’s a good idea to invest in them later when you decide you want to create more personalized finished products.
Effects
If you want an antique or vintage feel, you can use specific types of metals. Certain metals react to different acids and create an aged look, so you could soak your stamped metal. You can create a stunning Patina effect by mixing one cup of peroxide, half of a cup of salt, and four cups of white vinegar and soaking your stamped metal.
Shapes
You can get blanks and metal tags in several shapes and sizes that are fun to work with, but they’re also more challenging. As you get comfortable with working with your metal and stamping it, try a few shapes. You don’t need to buy a ton, and you can buy them as you need them.
Dapping
If you have a dapping block, you can turn simple blanks into curves. You’ll get several different sizes with the circular daps. You slip your blank in, and the dapping black hammers the top of the blank to create a nicely cupped or curved effect that won’t impact your stamped design.
Bottom Line
Metal stamping is a popular hobby, and you can even turn it into a business thanks to sites like Etsy. With a few high-quality tools and a little practice, you can easily create professional-quality metal stamps right in the comfort of your own home. This comprehensive guide gives you everything you need to buy your tools and get started today.