Ultimate Guide To Alcohol Inks – Create Unique Art
If you love creating art that is beautiful, fluid and sometimes surprising, then alcohol inks are for you. The inks come alive in their own way, and when you embrace that and work with them, you will love creating with them. Follow this guide to learn more about alcohol ink and how to get started with one of the most fun and interesting craft applications out there today.
What are Alcohol Inks?
Alcohol inks are highly-pigmented inks that are alcohol-based, waterproof and permanent. They are used for card making, painting and other home decor projects.
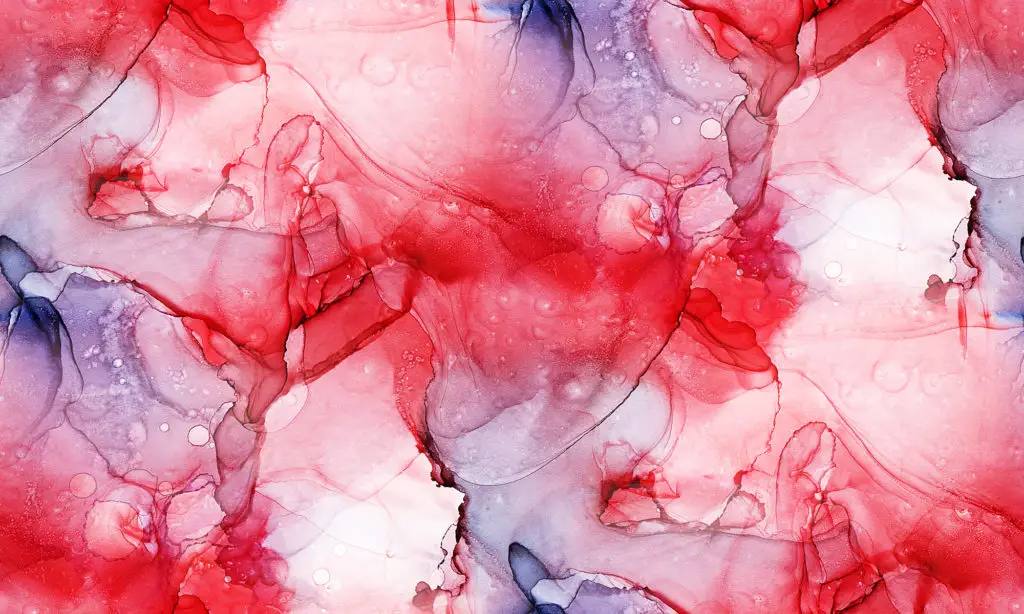
Alcohol ink is unique because it is very fluid and it dries very quickly. Once the alcohol that is in the ink evaporates, the ink that is left behind dries and leaves you with a very highly-pigmented, bold design.
The ink is transparent, allowing you to build layers as you go. Simply allow each layer to dry and then add the next. This transparency gives depth to your artwork.
Alcohol inks are designed for non-porous surfaces, so they work great on some surfaces that other paints may resist. These surfaces, as well as everything that you need to get started with alcohol ink, will be discussed in greater detail below.
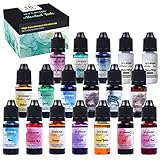
- 【Higher-Concentrated & Pigmented】: LET'S RESIN alcohol-based transparent alcohol ink, which is low odor, utilizing a higher concentration formula to ensure great depth and vibrancy,thicker than average alcohol inks; a little drop can go a long long way. By mixing with alcohol blending solution can help achieve lighter colors and increase more transparency.
- 【Versatile Alcohol Ink for Epoxy Resin】: ideal resin alcohol ink for creating various unique effect in epoxy resin, including resin petri ,resin swirl,resin marble,resin ripple/cloud,resin flower,epoxy resin painting, especially great for making resin tumbler cups,resin coasters,resin jewelry,resin keychain,resin molds,as well as other alcohol ink art including coloring polymerclay,metal,rock, wood,plastic,leather,glass,ceramic & more.
- 【Vibrant & Vivid Colors】: LET'S RESIN rainbow alcohol ink set has a wonderful selection of highly-saturated alcohol paint with vibrant colors, including black, brown, coffee, blue, sapphire blue, green, purple, purplish-red, red, peach red, orange, yellow, lemon yellow, white alcohol ink. Each bottle contains about 10ml/0.35 oz.
- 【What's the Special】: LET'S RESIN alcohol resin ink works a little differently from other alcohol ink because they don't spread so much in resin due to its high pigment, which allows you to control the colors more precisely and make some amazing and personalized effects in epoxy resin
- 【Quality Service】These alcohol ink bottles are individually wrapped and the nozzles are completely sealed(ATTENTION: Please be careful of spills when you cut the tips off due to the pressure caused by long time shipping). If you have any questions about LET'S RESIN resin alcohol ink, please feel free to contact us at any time.We will provide good service to ensure your shopping experience.
What Materials Do I Need To Get Started?
The first seven items are necessary to begin. The last seven items are optional, depending on what you want to do with the alcohol inks. All of them will be discussed throughout the article so you can decide if you want them.
Most of these items can be purchased at local craft stores such as JoAnn or Michael’s. You can also find many online at Amazon, Tim Holtz or Ranger Ink.
1. Two or three alcohol inks
2. Yupo paper or other surface mentioned below
3. Applicators including liquid droppers, ink tool with felt and blending foam applicators
4. Well-ventilated space or respirator mask
5. 91% isopropyl alcohol
6. Blending solution
7. Paper towels
8. Heat tool such an embossing gun or hairdryer
9. Blending pen
10. Splatter brush
11. Paint brushes
12. Alcohol lift ink
13. Rubber stamps
14. Alcohol ink air blower
Are There Different Types of Alcohol Inks?
The standard alcohol ink comes in several brands. You will want at least two or three colors to get started. You can purchase a three pack in the beginning, but once you are hooked, you will save money by purchasing a large set.
Ranger makes a line by Tim Holtz that is available in most local craft stores. These inks are particularly great for beginners because they are easy to find, are merchandised with other necessary supplies and are easy to use. There are also many tutorials online by Tim Holtz show you exactly how to use them.
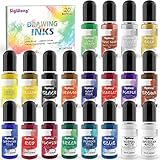
- 【20PCS VIBRANT COLORS ALCOHOL INK】: Total 20 beautiful colors lime green, lemon yellow, yellow, black, orange, navy blue, scarlet, purple, brown, sapphire blue, red, fuchsia, green, peacock blue, blue, rose gold, gold, silver, advanced white, normal white. Each bottle contains 10ml/0.35 oz.
- 【WIDE RANGE OF USE】: Suitable for epoxy resin, not for UV resin.; It provides vibrant colors and endless possibilities, achieve highly pigmented, sinking effect, layer and creating depth, which can be ideal for resin coasters, Petri dishes, tumbler, paintings and epoxy resin art.
- 【HIGHLY CONCENTRATED】: High concentration of alcohol-based inks, just a little drop then can go a long way. You could dilute these inks by mixing with alcohol to achieve lighter colors.
- 【EASY TO USE】: These liquid resin dye are sealed in bottles. Beginner friendly and the experienced/veteran can enjoy it as well, the squeeze bottles make it easy to control your drops so that you can get the perfect shade every time. You can create mesmerizing patterns in crystal clear epoxy resin.(ATTENTION: Adding too much inks will affect resin curing)
- 【AFTER-SALES SERVICE】: lf you have any questions or issues regarding the alcohol ink please do not hesitate to send the seller a message through Amazon and we will respond within 24 hours.
If you want your project to have some luster, then alcohol pearl inks are perfect. Pearl inks look best when used with regular inks and blending solution to add depth to your project. Simply shake well before using and the pearl will be bonded with the ink so it will not rub off.
There are two different ways to add a metallic sheen to your work. There is a mixative that can be added to your regular alcohol ink to give it a metallic look. It blends with the paint so that the color looks metallic.
The second way is by using alloys. These work more like leafing and add bold metallic colors and lines similar to marbling in between the colors, rather than mixing with them. These are super vibrant.
What Types of Surfaces are Best for Alcohol Ink?
Non-porous surfaces such as a glass, metal, ceramic, plastic, leather, vinyl, stone, and polymer clay are perfect for alcohol inks. Those may be a little intimidating when you are just getting started though. There is also special cardstock made for alcohol inks as well as a popular product called yupo paper.
Yupo paper is a synthetic paper, made from plastic. It is very forgiving, so you will have more time to move the ink around before it dries. Another great thing about yupo is that both sides are the same, so you do not have to worry about which side is up.

- Watercolor Paper Sheets: Explore your creative side with this set of 9x12 paper for art and painting projects that's perfect for beginners or experienced artists of all ages
- Perfect Painting Supplies: The water color paper for artists is perfect to use with watercolors and mixed media techniques like ink, pastels, oils, and acrylics; great to use at home or for art class
- Reliable Quality: This set of heavyweight, non-absorbent 215gsm synthetic paper features a smooth surface that resists buckling and dries quickly; each sheet is non-porous and used for alcohol ink
- Dimensions: Each sheet of bulk watercolor paper measures 9 x 12 inches
- Comes With: You will receive 20 white sheets of alcohol ink paper to add to your arts and craft supplies
When you work on yupo, the color replaces the color that was there. For example, if I already made a circle from putting down a drop of red and then put a blue drop on top, the blue will replace the red. It will not make purple unless the two colors are blended together with a blending solution.
Yupo is great if you want to start over with your design. It is so forgiving that you can remove most of the ink by dripping alcohol on it and wiping it with a paper towel. It will leave a light staining behind, but it will cover easily with new ink.
There is also a translucent yupo paper, which is similar to vellum. It is great for putting inside something where you need it to be flexible, like an ornament. All yupo products are available in many different sizes.
If you are planning on using your alcohol inks mainly for card-making or scrapbooking backgrounds, then you will want to use alcohol ink cardstock. It is not as thick as yupo, so it is better for cards. Regular cardstock is too porous, so be sure that it is alcohol ink cardstock.

- High-Quality Paper - Pixiss craft paper is acid-free, heavyweight cardstock and 100% polypropylene. It's durable and reliable, yet extra-smooth so to be suitable for all of your potential projects.
- Artistic Freedom - Pixiss' alcohol ink paper works well with all popular alcohol ink brands. Embrace the process, knowing your artwork will pop on this smooth canvas.
- Versatile Creations - Thanks to the smooth surface and durable composition of our art paper, it is suitable for all skill levels and ideal for drawing, painting, scrapbooking, and more.
- Ample Supply - Each pack contains an abundant quantity of high-quality stock paper, ensuring you have more than enough for your masterpieces.
- Your Canvas Your Way - Choose from 2 colors and various quantities, sizes and weights to suit your needs. This white art paper measures at 8"x12" and weighs in at 300gsm with a quantity of 25 sheets.
Glossy cardstock is great for making your own swatches, but realize that when you use alcohol or blending solutions with them, the colors will break down and change. Never expect a certain color, but be prepared for some wildly exciting surprises. This is a more affordable option to begin with while learning the process.
You may read that photo paper is a great option for alcohol inks, but it is best for painting with the inks. It is not good for creating fluid backgrounds because the photo paper has an almost sticky finish to it that does not allow the ink to flow well.
There are also some specialty papers made just for alcohol ink, and they come in metallic and sparkle. These are phenomenal because once the ink dries, the metallic or sparkle shows through so it looks as if the paper was the color of the inks to begin with.
Alcohol ink hardcore art panels are a great way to experiment with resin. They come in different shapes and sizes. Once the resin is poured over a dried alcohol ink design and sets up, it makes the hardcore art panel look like a ceramic tile, but without the extra weight.
Working With the Inks
Alcohol is used to dilute the ink but it also removes the ink, so it works great to make white circles because it pushes the ink out in a circle pattern, leaving white in the middle. You can drip the inks directly onto your surface and then use a dropper to drip alcohol onto the ink and watch it move around the page. You can use a heat tool or hairdryer to dry the ink quickly.
Blending solution will lighten, remove or blend colors. If you want to lighten an area, add some blending solution to your dauber and go over that area. You can dab blending solution onto one color and it will bring out many different tones of that color and blend them together.
What Methods Can I Use to Apply the Ink?
The drip method simply means you will let drops drip out from the bottle onto the surface. You can then use the alcohol ink blower, which is a rubberized bulb that will allow you to squeeze air closely to your project without your face being anywhere near it. Do not use straws because your body will want to immediately inhale after you exhale, and you are too close to the inks and will be sucking in fumes.

- 6 Pixiss Watercolor Blender Pens - Fill the pens with your blending solution and apply the solution to your alcohol ink project. The flexible and fine tips make it easy to apply with precision.
- Versatile Brush Sizes - Cater to a variety of artistic needs with multiple brush options, perfect for different strokes and effects. Compact and leak-resistant, ideal for artists on the move
- Smooth Blending - 4 oz, features fine tip applicator nozzle for improved control. Lightens, blends, and even removes alcohol ink. Achieve seamless transitions between colors.
- Quick Drying Formula - Saves time and reduces smudging, ensuring your artwork remains pristine and vibrant with an affordable and convenient bundle.
- Improves Ink Adhesion - Helps inks adhere better to various surfaces, expanding the possibilities for your art projects. Ensures your artwork stays vibrant and does not fade over time.
For the pour method, use a little cup and add some alcohol as well as the ink colors of your choice. You can simply pour them onto your paper. Then you go in and add drops or splatter if you want to or leave it as is.
The paint or brush method is a great way to try your hand at controlling the inks a little more. You can drip the inks into empty wells and let them dry. Dip a paintbrush or the blending pen into alcohol or blending solution, then into the dry ink, and paint in a similar way that you would paint with watercolors.
The ink tool method allows you to dab the ink onto your surface to create unique backgrounds with lots of movement. Attach a felt pad to ink tool, drop on as many colors of ink as you desire, then repeatedly dab them onto the surface until you like the pattern. You can add drips or splatters on top of this as well.
What are Some Fun Techniques to Try With Alcohol Inks?
– Background Prints: Make prints by dropping inks directly onto one piece of yupo and then laying another piece on top of it. Rub lightly to transfer the ink to the second piece. This gives a softer look and creates mirror images of the same design, great for backgrounds.
– Galaxy Background: Use a splatter brush to splatter alcohol onto your page that you already have ink on. The alcohol leaves white circles in different sizes all across the background, resembling stars.
– Smear Background: You can put drops of ink and blending solution on a glass work surface and then dip your paper into it, spreading the ink all around. You will get a different effect each time.
– Outlining: Add lines with permanent glass marker to highlight certain areas of the design. You can easily add definition this way. Outlining works great when showcasing flowers in your design.
– Alloy Marble: Add drips of alloy inks to your regular inks. Then use a heat tool or hairdryer to move the ink around. The alloys will naturally cling together, creating harsh metallic lines to resemble marbling.
– Reverse Stamping or Lifting: Use alcohol lift-ink along with a rubber stamp to create a white space in the design of the stamp. Use a background that is not super busy because that will make it difficult for you to see the image. Make sure your stamp is clean and free of all old ink.
Add the ink to the stamp of your choice and apply to the paper. After removing the stamp, dab the background so it will lift the color where the stamp was. Do not wipe because then it will smear.
Simply dab until there is no color left on your paper towel. You are left with a beautiful white image. The stamp can then be used on alcohol ink cardstock to transfer the image to cardstock and it will be permanent.
– Stenciling: The refill bottle of lift-ink will allow you to use the lift ink as a stencil. Add the ink to blending foam on your ink tool and dab over the stencil. Do not swipe, but simply dab until you have covered the entire area.
Remove the stencil carefully, so that none of the lift ink gets onto the wrong part of your project. Take your paper towel and dab until there is no color left on the paper towel. The image will appear in white because you removed the ink from the area, and it will be stunning.
– Bubbles: Create fun bubbles on your page in a few simple steps. Create the background first by dabbing or dripping the ink onto the surface. Then set glasses or plastic cups on top of the wet paint and add some more ink around the outside of the glasses or cups.
You may need to weigh them down so they do not travel on the wet ink. Use a heat tool or hairdryer to quickly dry the ink around the glasses or cups and then remove them. Now you have awesome looking bubbles that you can leave as is or that you can continue to build layers on.
Finishing Touches
To help keep your ink from fading and to be sure that it does not come off of the surface, you can spray it with Krylon UV Resist Clear or another clear finish. Two or three coats are recommended, but be sure to allow them to dry completely in between coats.
Epoxy can be added to give a smooth, glossy finish. Seal it with the clear coat first so that the epoxy does not reactivate the ink or your design may continue to change. The epoxy is self-leveling, so it creates a smooth surface without a lot of effort on your part.
Clear resin works similarly to the epoxy and is available specifically for alcohol inks from Ranger’s Tim Holtz line. It is high gloss and works great with the alcohol ink hardcore art panels, giving them a professional looking finish.
Ranger also carries a multi-medium gloss that acts as a sealer. It comes in both matte and gloss and is perfect for smaller projects.
Tips and Tricks
1. It is okay to leave the lids off of the regular alcohol inks for awhile because the bottle is designed to in a way that they will not dry out quickly. You want to have all of the lids off of the colors that you are going to use so they are ready to go because they do dry quickly one they are on the paper.
2. Do not leave the lids off of the alloy, metallic or pearl inks because those need to be shaken right before each use so that the metallic pigment really mixes in. Pre-shake them before you begin so you can just give them another quick shake just before applying.
3. You may read about putting alcohol ink in a spray bottle, but this is very dangerous. They are not meant to be airborne and can be toxic if inhaled into the lungs. The splatter brush is a great way to get a similar effect.
4. Avoid hard lines by adding blending solution to your inks. You can apply it directly to a hard line to soften it.
5. Throw away felt pads after you use them, but let them dry first. Do not store wet pads in any kind of air-tight container because they will become combustible since the alcohol ink is a solvent and contains ethanol.
6. Do not have expectations of the inks. They are meant to be fluid and seem to have a mind of their own. Rather than trying to control them, be prepared to embrace whatever happens and turn it into something beautiful.
7. Have fun and keep experimenting. If you don’t like something that you made, let it dry and then create something new over top of it.