What Is Free Motion Quilting? How Do I Get Started?
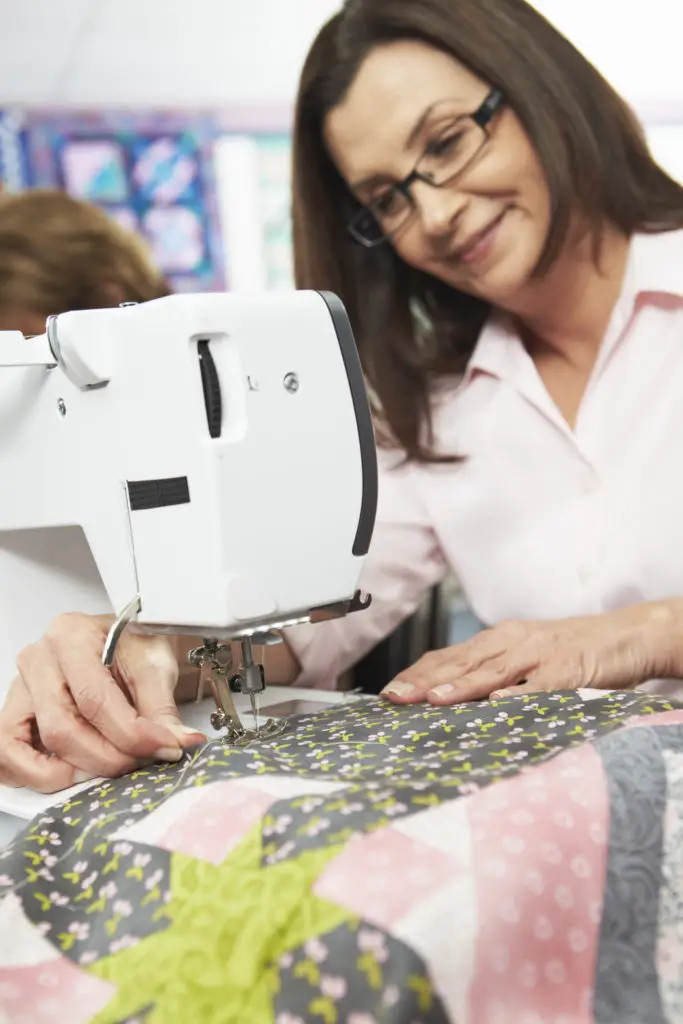
You have chosen your quilt pattern and fabrics. The quilt top is sewn and your quilt sandwich is put together. You have decided to do your own quilting with your own sewing machine, but where do you begin?
Stitching straight lines could complete the quilting, but maybe you realize that a design of some sort would look great on your quilt. If you do not want to stitch all of the quilting by hand, then the perfect option for your regular sewing machine is to do free motion quilting.
Sometimes free motion quilting is mistaken for freestyle or free-hand quilting, which causes people to believe that they must come up with a design by themselves. This is often true of freestyle and free-hand quilting, but you can use a stencil or pattern when you do free motion quilting.
Free motion quilting is when you stitch your quilt sandwich together on a regular sewing machine, rather than on a long-arm quilting machine, without using the feed dogs to pull your fabric. Whether or not you follow a stencil or your own design, it is called free motion quilting anytime you are stitching your quilt without the feed dogs.
Why should you try free motion quilting? The best reason is because you can do it on your regular sewing machine. In fact, that is exactly why most people prefer it.
These are the five simple steps to get ready to begin your free motion quilting. You will learn more about each one below.
1. Lower the feed dogs.
2. Use the correct foot.
3. Decide on the design.
4. Choose coordinating thread.
5. Practice first.
Step One: Lower the Feed Dogs
So what are the feed dogs? The feed dogs are located directly below the needle on your sewing machine. They look a bit like teeth, sticking up toward the needle. The feed dogs pull the fabric according to the stitch length that you choose when you are sewing forward or in reverse.
Feed dogs make straight stitching easy and accurate. They also work well with slight curves. They do not do well with full circles or tight curves, which are what we often see in quilting.
If you want to complete your quilting with any design other than a straight stitch or a large wave pattern, then you will definitely want to disengage the feed dogs. This will make it easier to complete the design that you choose. It also gives you complete control over where the fabric is going as you stitch.
Most new sewing machines have a lever that you use to lower the feed dogs. An older sewing machine may have a cover that you place over the feed dogs to keep them from popping up as you sew.
If you cannot figure out how to disengage the feed dogs on your sewing machine, then set the stitch length to zero. By setting the stitch length to zero, the feed dogs will not pull the fabric forward since the zero tells it that you want to keep stitching in the same spot. This allows you to pull the fabric in any direction that you choose.
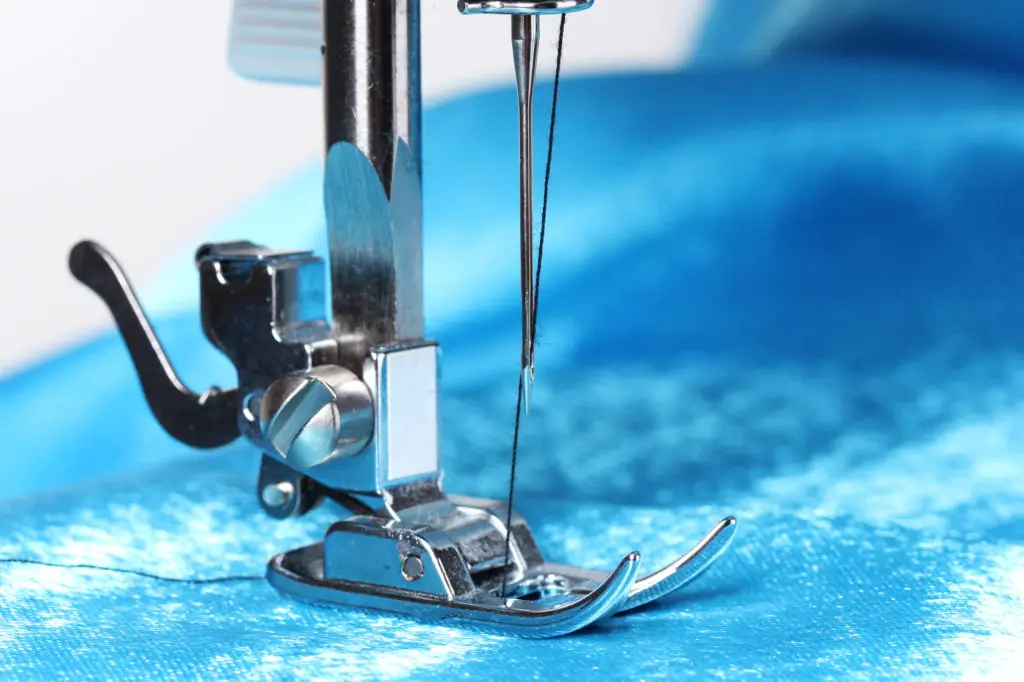
Step Two: Use the Correct Foot
Now that your feed dogs are down, there is another important step. You must use the correct foot for free motion quilting. The regular presser foot will not work because it holds the fabric down.
Depending on the manufacturer of your sewing machine, the foot may have a different name than free motion foot. It may be called a hopping foot or a darning foot.
The foot should have an open circle that the needle goes through. This allows you to see where it is stitching so you can move your fabric accordingly.
Some of the feet are made of clear plastic, but do not let the idea of a plastic foot scare you into thinking that it is cheap or flimsy. It actually allows you to see what you are doing better than a metal foot does. These are highly recommended for this reason.

Some people find success with other feet for their free motion quilting. You can practice to see what works best for you, but be sure to pick one that does not firmly hold the fabric against the machine. It needs to be free to flow up and down as you guide it along.
Step Three: Decide on the Design
Next you will decide on the design that you are quilting. You may use a stencil if you wish. Simply trace it onto your quilt using a quilting marker or a quilting colored pencil. Depending on which you get, these markers and pencils are designed to either wash away, fade away or go away when heat from an iron is applied.
You may decide that you want to stitch a design that you do not necessarily need a pattern for. For example, maybe you will just do a random squiggle down each row. You will still want to lower your feed dogs and treat this as free motion quilting because there will be tighter curves.
Another option is to stitch around pictures or designs in your fabrics. Use the fabric as your guide and use free motion quilting to maneuver your fabric around to stitch exactly where you want to stitch. You are in control, so you can be as creative as you let yourself be.
Step Four: Choose Coordinating Thread
Your thread is what makes your quilting pop, so be sure to pick one that coordinates with your desired look. You can use the same color as your fabric, or the most common color in a printed fabric, if you want the design to be more prominent than the stitching.
If you want the stitches to really show and be the prominent feature, then it is best to choose a thread that will contrast the colors in your quilt. Also, do not feel limited to using just one color. You may quilt with one color on some squares and another color on other squares.
You are the designer and you have complete control over the final look of your quilt. It is okay to go with your heart instead of trying to make it look like something you have seen in a magazine or a book. Now, thread your machine and you are ready for step five.

Step Five: Practice First
So many people would like to skip the practice step, but you should definitely do some practice before stitching on your masterpiece. Begin by using some scraps to make a mini quilt sandwich.
Trace on the same design that you plan on using on your quilt. Then practice moving your fabric as you stitch. It takes some time to get used to, so do not give up.
You are used to the machine pulling the fabric while you simply guide it to make sure it stays on course. Now you will decide where it goes and keep it on your course by yourself, so play around and see what feels comfortable to you.
Some people find it easier to go from left to right around a circle and others find it easier to go right to left. Practice moving in all the different ways possible to see what works best for you. Once you are comfortable, move on to your quilt.
Free Motion Quilting Tips and Tricks
Still feeling a bit nervous about using free motion quilting on your quilt? Follow these tips and tricks to help make it a smooth and fun activity.
1. Be sure that your quilt sandwich is pinned together well or basted well with a quilt basting spray.
2. Use quilter’s gloves so that you do not lose grip of the fabric as it moving around and to save from strain on your hands.
3. Use a thinner quilt batting for the first time that you do free motion quilting to make it easier to maneuver the quilt sandwich.
4. Be sure to have as much table space as possible to help hold the quilt up as you go, even if that means setting up a folding table beside your normal workspace.
5. Use the same color of thread for the bobbin that you used on the top. By doing this, if the thread pokes through from the bottom, no one will know because it is the same color.
6. Choose simple designs or stencils for your first time.
7. Go slow to make it easier to get around curves.
8. The stitching does not need to be continuous, so you can end the stitching in an inconspicuous spot in order to turn the quilt or move to a new square.
9. When you need to pause or stop stitching, do so with the needle in the down position so it will hold the fabric in place until you are ready to stitch again.
10. Look through magazines or books for inspiration, but do not compare your work to theirs.
11. Roll or clip down parts of your quilt that are in the way and to make it easier to move around.
12. Enjoy the process. Have fun and be proud of yourself.
Free motion quilting is very enjoyable once you get the hang of it. Have fun and do not stress about how things will turn out. Remember that you always have your seam ripper if things do not go your way the first try.