What Is Parking In Cross Stitch And Should You Do It?
Cross-stitch is a focused pastime that helps you regain mental control and calm your nerves. A lot of people who do cross-stitch find that it is a very relaxing and engaging hobby that often whiles away a lot of hours very quickly. If you love cross-stitch, but you are just getting started, you may hear about various techniques and “short-cuts” that can help you churn out perfect cross-stitch projects.
One such technique is “parking.” You might find this technique very useful as you go along in the cross-stitch world and begin working on bigger and bigger projects.
What Is Parking?
Parking is working an entire row of stitches all the way across the horizontal line of a project. (Some people have also used parking to work vertically, but that tends to be a little more complex than the horizontal approach.) As you finish using each color for the expected number of stitches in that color in one area of the line of stitch, you retract the needle from the floss and leave the remaining floss hanging.
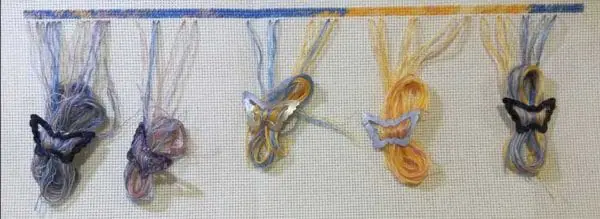
Some stitchers may use hair clips or snap barrettes around which to loop their loose floss and keep it from undoing stitches, but that is up to you. If you have multiple needles at your disposal, you can park each color of floss and its needle at the last stitch you did in that color. To avoid getting poked by that many needles, people generally use the needles to set up the next stitches above the row that is currently being worked on by poking the needle through the next corner hole in the cross-stitch cloth.
Who Should Use Parking?
Any cross-stitcher anywhere can use parking on their projects. It really does not matter when it comes to the size of the project. However, people who are working on five-hundred or one-thousand-plus counted cross-stitch projects will find this technique especially beneficial to what they are doing. You can try it on smaller projects to start, just to see if this technique is something you want to continue employing.
If you utilize a standing frame for your cross stitch pattern, parking can work very well. Leaving your pattern in the frame will allow you to hang threads more easily and keep them from getting tangled.
Also, if you tend to do full-coverage cross stitch projects, parking is a great way to be efficient with your stitching. It all depends on what’s comfortable for you.
When Should You Use Parking?
When a project only gives you “x” amount of floss in specific colors and you are supposed to use this floss sparingly to complete the project, parking can help. You should never attempt to use replacement floss because dye lots for embroidery floss are not always an exact match.
You could end up with four shades of “evergreen” floss in a single picture when you attempt to match floss color names and still fall short of matching the color/dye lots exactly. By parking your limited colors as you work, you are less likely to waste any of the floss that came with the project and more likely to finish the project with everything looking exactly as it should.
Where Should You Use Parking on Your Cross-Stitch Project?
This is not a technique to use is you literally only have one to three stitches in a single color in one spot on your project. However, when you have multiple stacked rows of the same color in your pattern grid, and the project has lots of these layered rows of color, parking in these areas is an excellent approach to keeping your stitches in the right locations and as the correct colors.
Why Should You “Park” Your Stitches?
There are multiple benefits to parking stitches.
- One, you will never run out of the correct colors and dye lots of floss in your kits.
- Two, you will not lose your place in your project when you attempt to do just one specific color and all of the stitches in that color in your project.
- Three, if you make a mistake in your counting, the parked stitching will come out more easily than if you did an entire section of a project and then discovered that you made a big counting mistake.
How Do You “Park” a Color/Stitch?
Parking stitches is a lot simpler than you might think:
1. Thread your needle (or needles!) in the colors of floss you will need to go across one complete row in your project.
2. Begin in the lower left corner and work all the way across to the lower right corner.
3. As you change colors for new stitches, let the floss hang loose or poke your needle up through the two corners of the same colored stitch in the next row above and leave it there until you complete the first row.
4. Repeat these actions until you have to tie off and add more floss, and then repeat the process all over again.
You may find that your parked stitches are set farther and farther apart when you end up using more and more of a certain color than the colors around it. Just keep working with this process adding new floss as you need to and as you go, and the parking technique will work itself out as you go.
Should You Use Parking All the Time?
Well, that really depends on your personal preferences. You may decide that you do not like parking at all, or that you only like parking for certain types of cross-stitch projects.
You may find that other techniques for keeping track of your colors and your stitches are better suited or more preferential for your projects. At any rate, you should still attempt this technique a few times to see if it can work for you and find out whether or not you like using it.
Also, if you are working on a project that has a large amount of colors (for instance, one of my projects currently has 200 colors), it may be too cumbersome to park your floss.
Where Can I See An Example Of Parking?
There are a number of great resources to see more about parking:
Peacock & Fig’s Tutorial On Parking
Advanced Cross Stitch Parking Tutorial